Use Windows Intune and Office Tool to Deploy Office 2010/2013
Some of you may have noticed that using the config.xml method may not be working for you in your environment. The config file method appears to still work when you are utilizing both Office 365 and Windows Intune together but it tends to fail when utilizing a non-Office 365 license such as a Volume License. I have put together a series of steps that will not only give you an alternative to the config file method but, furthermore gives you the option to really customize your version of Office for delivery using Windows Intune. I have included a tutorial in this article that will walk you through the process. This Option will work on Office 2013 as well.

Step 1: The first thing you are going to want to do is select a folder or shared folder if you are using a network to place your Office 2010 setup files. You will then create a .msp (Microsoft Patch File) by using the Microsoft Office Customization Tool (MOCT). This tool is included in most Office software packages. To access it open the Run Command and enter the location you have placed your Office 2010 package followed up with setup.exe. This part must be in quotations followed by a forward slash and the word admin.
Step 2: You will then begin customizing your .msp file by going through the setting and selecting the options you would like to have. For example, if you had a volume license, you can select which type you will be using and add a product key if you have it. Some items however will be mandatory for this to work as a silent install; Accepting the Licensing Agreement, Suppress Modal, and No Cancel should be checked. If you want to remove previous installations you can set that with this tool as well.
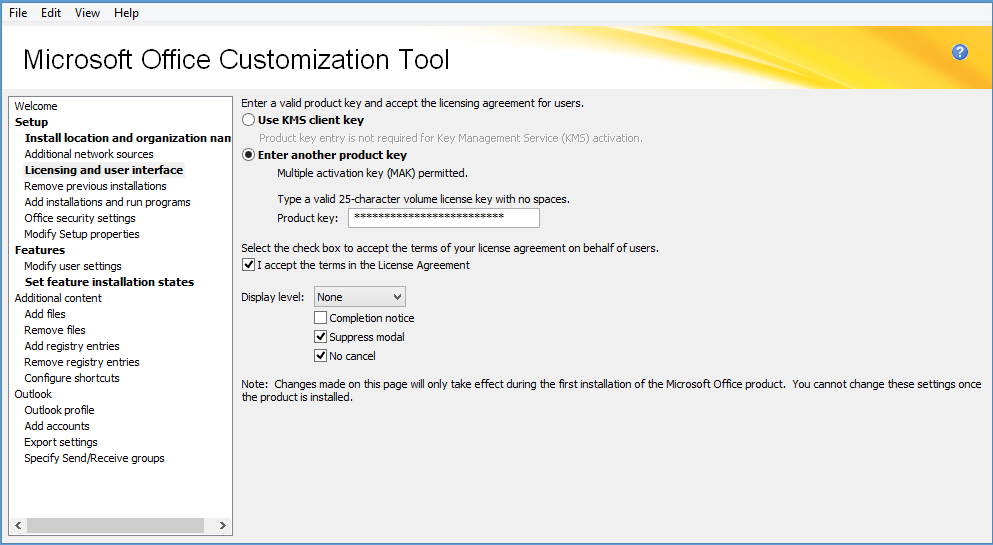
Click to enlarge.
Step 3: Select “Add installations and run programs, and set up your command line. This should be a post install with the target being the system folder. The argument should be the script.exe and in parenthesis list the path of the ospp.vbs followed by the /act.
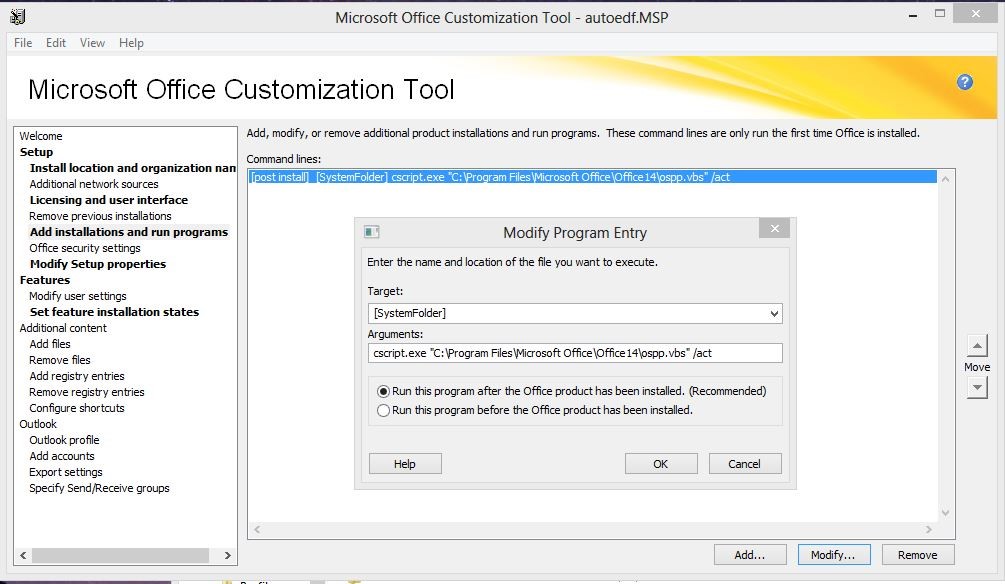
Click to enlarge
Step 4: You will then go to Set feature and installation states, and under Add/Modify Property Value enter the name AUTO_ACTIVATE and a Value 1. This is case sensitive and must be entered exactly as show. The purpose of Steps 3 and 4 are to activate and license the account, this should work regardless if the user does not have local admin right s on the machine.
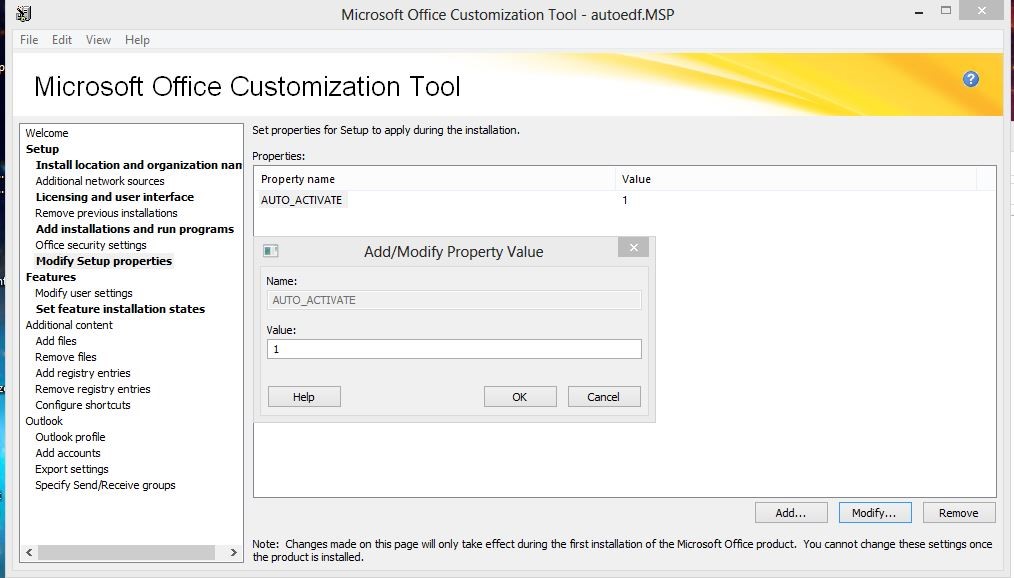
Click to enlarge.
Step 5: Once you have finished, save the file with a name you can remember, for this example I saved it as “auto.msp” and place it in the root directory of your Office setup files as pictured below. Please Note if you have a config.xml file in your ProPlus.WW folder go ahead and remove that as it won’t be used for this method.

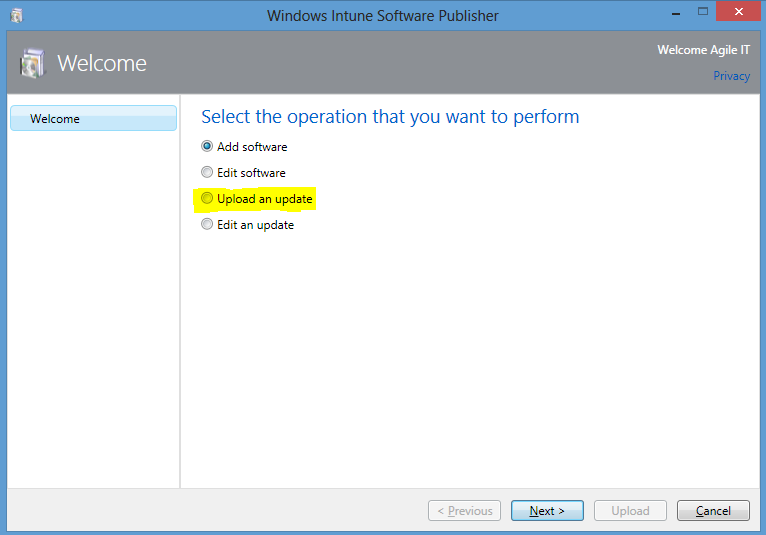
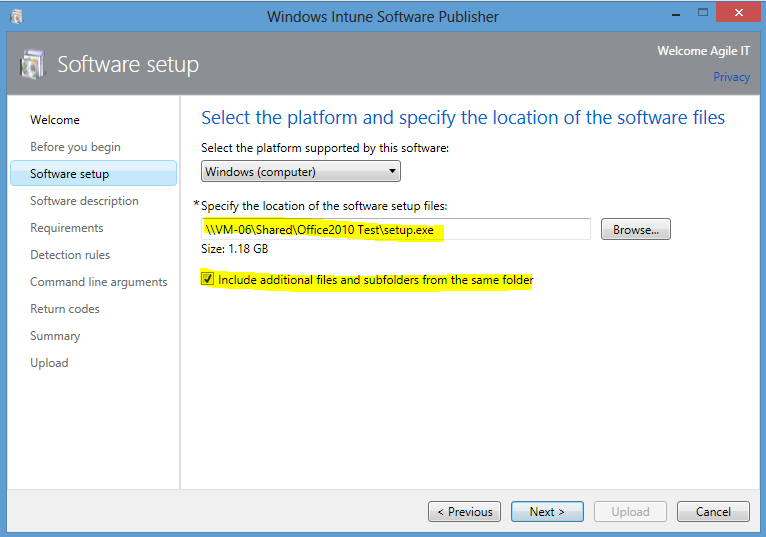
Step 6: You are now ready to being the upload process, open your Windows Intune Management console and locate and click on the “Software” tab. Once you are there, select option 1 Add Software. You should see a list of options select the “Upload an update” radial and click next.
Step 7: Browse to the location of your Office setup files and locate the “setup.exe file”. Be sure to check the box to include all additional files and subfolders.
Click to enlarge
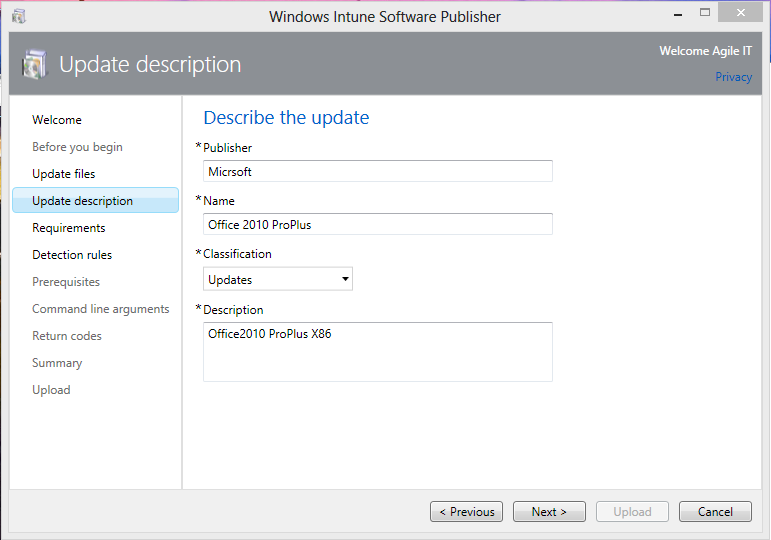
Step 8: Provide a description of the product that you will be uploading.
Click to enlarge
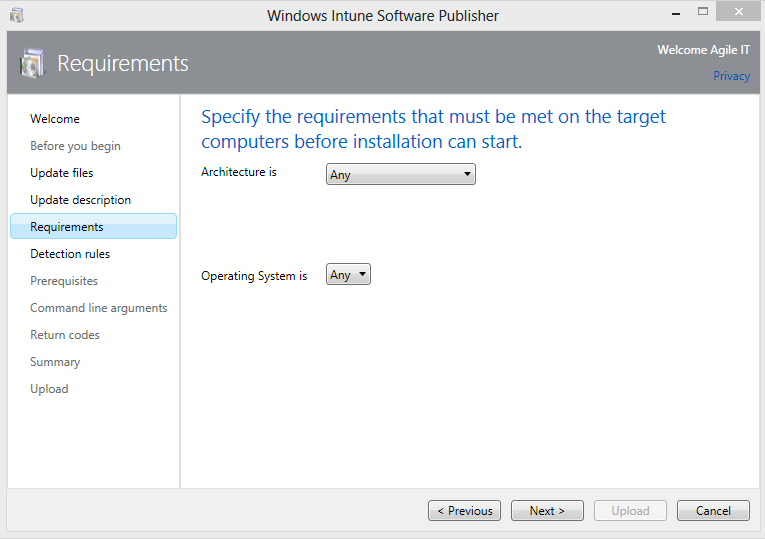
Step 9: This is dependent on what you are installing, in this example I am using 32 bit Office 2010 program, so it doesn’t matter if the target computer is a 64 bit machine and I may have a mix of different Operating Systems from Windows XP to Windows 8 so any will work fine.
Click to enlarge
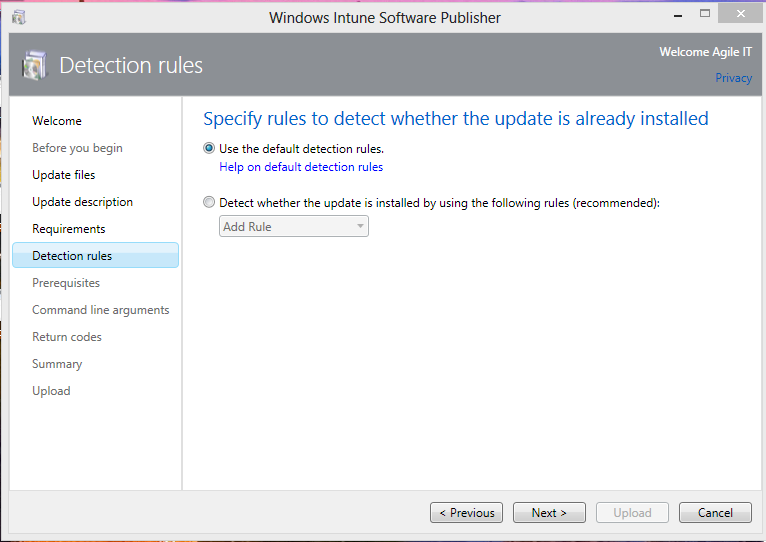
Step 10: You can add detection rules to determine if there is another version or an older version of the software in place, however you may have already addressed this through the use of the Office Customization Tool earlier and you will not need to put anything in this field and just use the default detection rules, click next when ready to proceed.
Click to enlarge
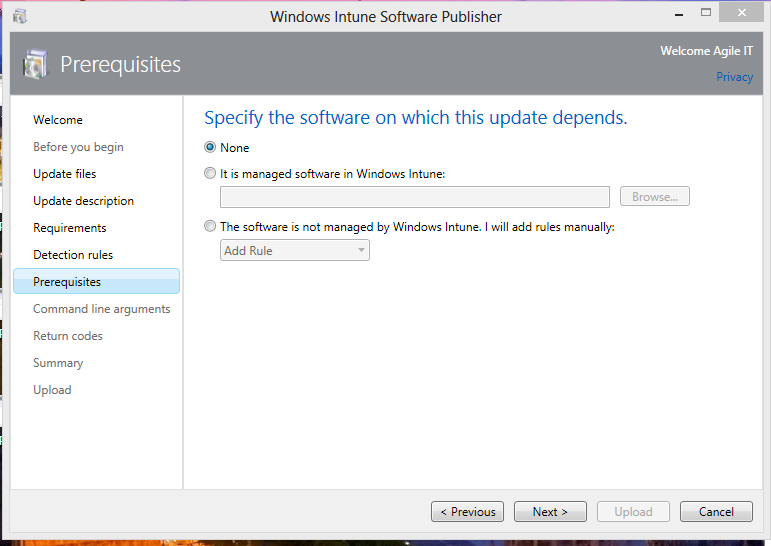
Step 11: No need to be enter anything as far as prerequisites just skip over that section by clicking next.
Click to enlarge
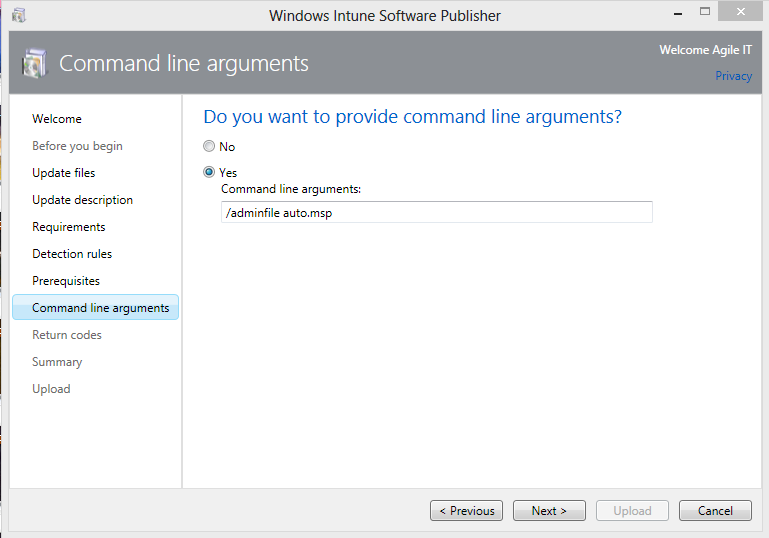
Step 12: For Command line arguments, select Yes and enter /adminfile and the name of your .msp file as shown below. If you remember earlier in this article I named this auto.msp, you will enter whatever you named your file.
Click to enlarge
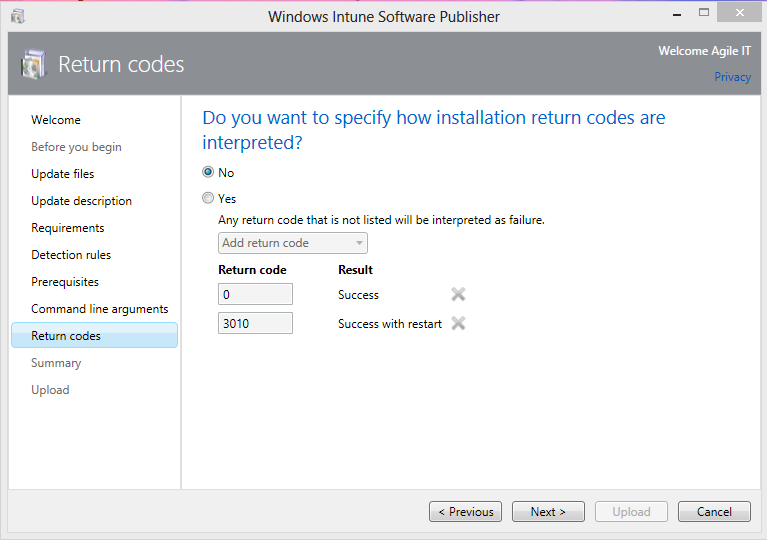
Step 13: You do not have to enter return codes so just select no and you are given a summary.
Click to enlarge
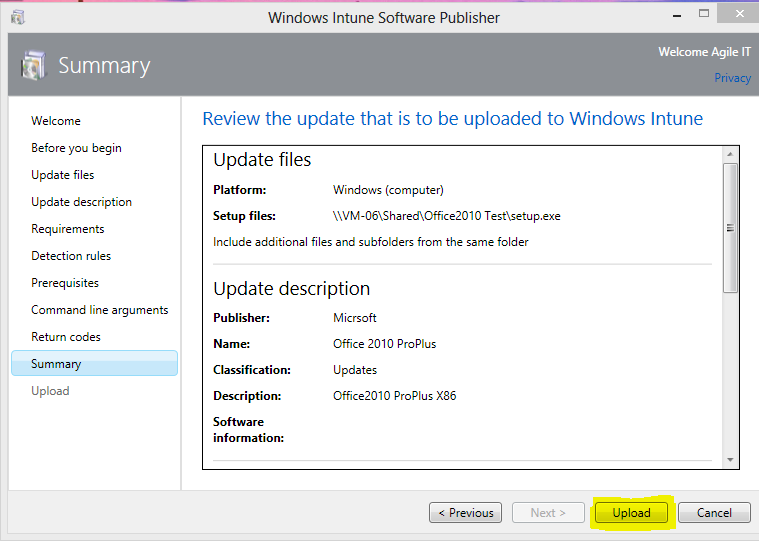
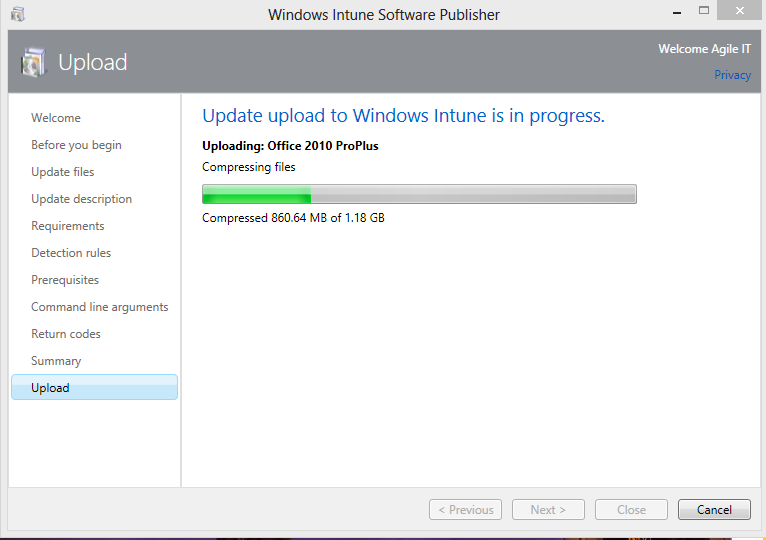
Step 14: When you are ready click Upload to begin.
Click to enlarge
Step 15: This part will take some time to complete, usually ranges from about 30 minutes to an hour.
Click to enlarge
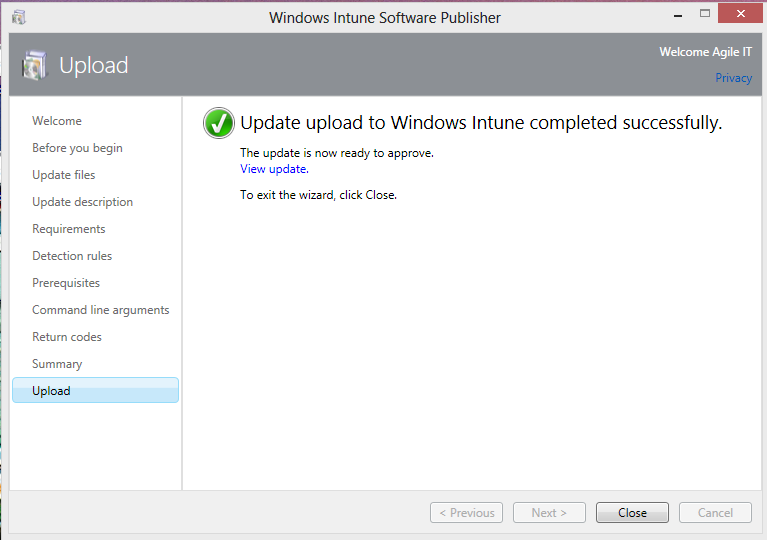
Step 16: Once Complete click close. You are now ready to deploy your Office 2010 package.
Click to enlarge
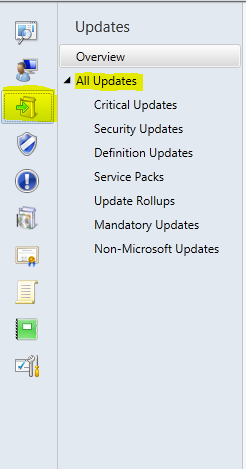
Step 17: When you return to your Windows Intune management console you will discover that the package you created is not listed in your software. This is due to it being installed as an update instead of software. To deploy the package, in the Windows Intune Management Console go to Updates then click on All updates.
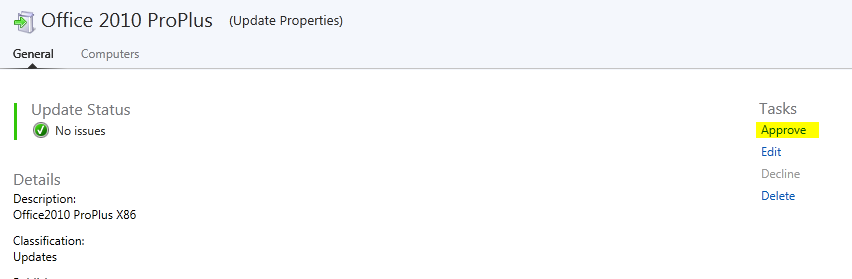
Step 18: On the right hand side of the screen you will see the filter leave that as none and Type then name of the file you created and search. Once located in the list click on that Update and open it.
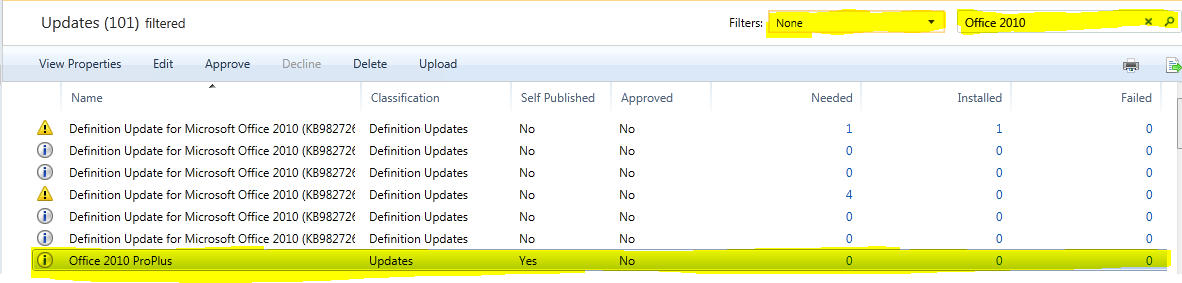
Step 19: On the right hand side under tasks click on Approve
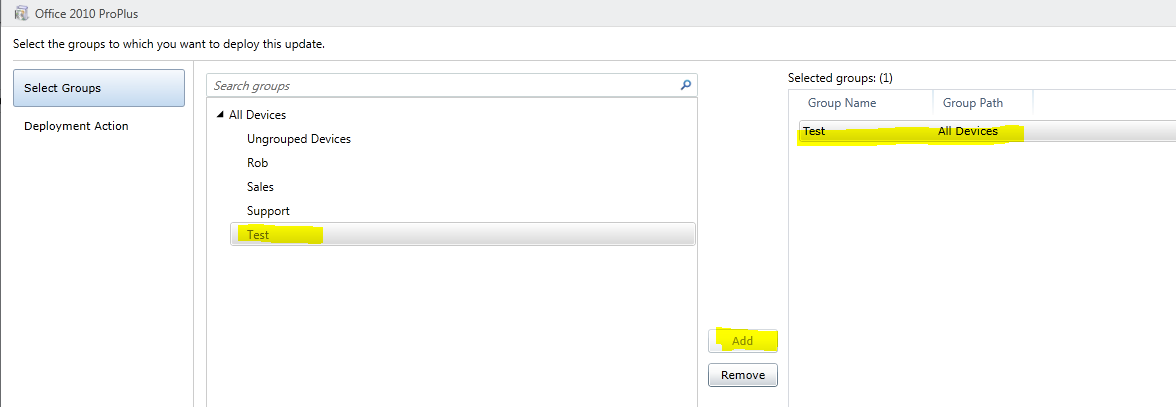
Step 20: Locate a Group of PC’s you want to receive this package. For this we created a test group and placed several PC’s into it, after you are finished click next. ***Note it is important to have separated the PC’s in to the correct groups or subgroups in which you want to have this package installed prior to starting. Any Pc’s in that group will receive this version of Office 2010 if it was not previously installed or if an older version is present. ***
Step 21: Select Required Install under approval and for the deadline select As soon as Possible, once completed click finish. This will ensure that it takes effect at the time of your next update (which is controlled by your policy) or you can wait for a few minutes and go to the pc and check for updates and start the update manually. I t runs Silent so you will not see any activity after downloading has completed. You can open a task manager and under process you will see the activity taking place there. Once it is complete you will receive a Windows Intune notice stating that the update has completed.
