Offboarding in Office 365 (Video)
Offboarding in Office 365 just as offboarding in general cannot be an afterthought If an employee is dismissed or leaves contentiously being able ...
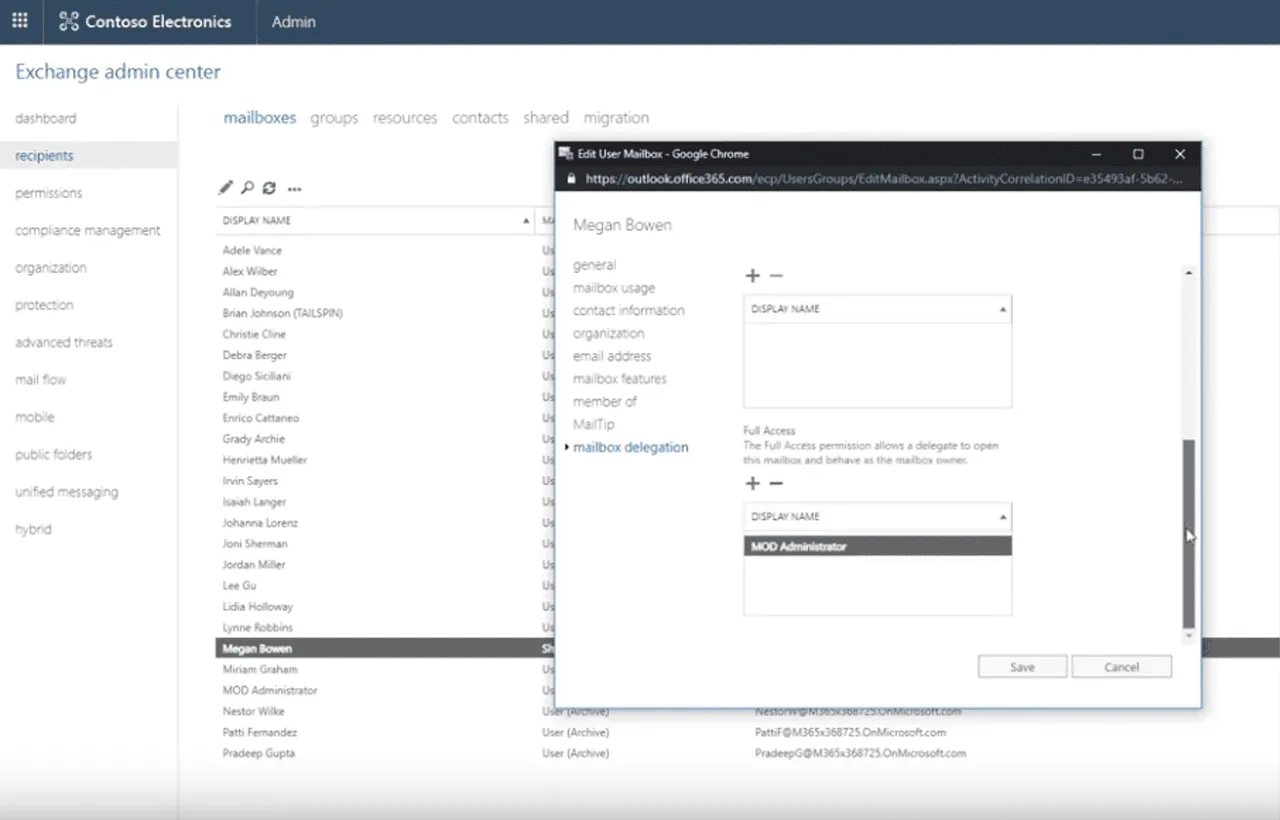
Offboarding in Office 365, just as offboarding in general, cannot be an afterthought. If an employee is dismissed or leaves contentiously, being able to quickly shut off access to your organization’s data is critical. Performing the offboarding incorrectly can leave the employee with access to critical systems and data, or even cause the loss of important information the employee might have saved in their OneDrive or Exchange accounts.
In this Tech Talk we look at the proper steps to quickly and effectively remove a former employee’s access while preserving data. For the demo, we fired Megan Bowen! Megan is a default user created in many Microsoft demo tenants, so she appears again and again in Microsoft demos as the employee who is out there sharing sensitive data, clicking on phishing links or downloading malware. If you watched many of our Tech Talks, you probably recognize her name. Well, we’ve had enough and it’s time for Megan to hit the road.
Steps to Employee Offboarding in Office 365
There are 7 steps, plus an important step zero to offboarding in Office 365.
- Step Zero: LOG THEM OUT!
- Save mailbox contents
- Forwarding or converting to a shared drive
- Wiping and blocking mobile devices
- Block access to O365 Data
- Move OneDrive content
- Remove and delete license
- Delete user account
Step Zero: Log the user out of Office 365
First, we want to make sure the user’s current session does not allow them to continue accessing company data.
Reset Their Password
- Go to admin.office.com
- Click Users > Active Users
- Click the user you are offboarding
- Click Reset password
- Either create a new password or generate one
- Click Reset
- IMPORTANT: Make sure “Send password in email” is not selected
- Click Close
The user login token in Office 365 is set to expire every 60 minutes. When this token expires, or when they move into a different application, the user will be asked to log in again with the new credentials (that they don’t have). If you wish to expire the token immediately, use the PowerShell command “Revoke-AzureADUserAllRefreshToken__”
Sign them out of OneDrive
- Go to user properties
- Click the OneDrive tab
- Click the “Initate sign out” button
Saving Mailbox Contents During Employee Offboarding in Office 365
There are two options to save a former employee’s mailbox content.
Migrate the mailbox to another user
To do this, you will want to add the employee’s email address to Outlook and then export the data to a PST file. You can then import this PST file to another email account as needed.
Place the Mailbox on Litigation Hold or In-Place Hold
This will occur automatically if you have Office 365 retention policies configured for it. It can also be completed manually:
- Go to Exchange Admin Center
- Click Compliance management
- Click In-place eDiscovery & hold
- Click + for New hold
- Name and describe the hold
- Click + to add mailbox
- Click Add ->
- Select “Include all content”
- Select “Place content matching the search query in selected sources on hold”
- Finish!
Forwarding or Converting to a Shared Mailbox?
Forwarding works, but you need to maintain the employee’s license, so it is not the optimal solution in most cases. By converting their account to a shared mailbox, you eliminate the need to maintain licensing unless the mailbox is larger than 50GB. If the license is larger than 50GB, you can archive older messages to bring the box down to size, keeping the shared mailbox free in perpetuity.
How to Convert a User Mailbox to a Shared Mailbox
- Go to Exchange Admin Center
- Click recipients
- Select Mailboxes
- Choose the user mailbox
- Look for the heading labeled “Convert to Shared Mailbox”
- Click Convert
- You can also use Exchange PowerShell if you have an organization or recipient management role.
- Use the command:
Set-Mailbox -Identity [email protected] -Type Shared
- Use the command:
Blocking and Wiping an Employee’s Mobile Device
If the employee had a company owned device, it can be wiped and locked out of Office 365 from the Exchange Admin Center.
- Go to Exchange Admin Center
- Click recipients
- Select Mailboxes
- Choose the user mailbox
- Click View Details under Mobile Devices
- Select the mobile device
- Click Wipe Data
- Click Block
- Save
Block access to Office 365 data
Note, if you followed step zero, “Log them out!” you have already blocked access to Office 365. To make it official and disable anyone from signing in on the account you will want to block the user from signing in. If you just block the user from signing in with the following steps, it can take up to 24 hours for their sessions to expire, so it is suggested you log them out first, then block sign-in.
- Go to admin.office.com
- Click User Management
- Click the user you are offboarding
- Under the user name, select the icon for Edit Sign-In Status
- Select “Block user From Signing In”
- Save
Blocking access to email
To block a user’s access to their email, you will need to use the Exchange admin center.
- Go to Exchange Admin Center
- Click recipients
- Select Mailboxes
- Double click the user mailbox (The double click is important)
- Select mailbox features
- Click Disable Exchange ActiveSync and Disable OWA for Devices under Mobile Devices.
- Under Email connectivity, click Disable and then click yes.
Removing Office 365 Licensing for a Former Employee
Now that the user is almost totally locked out, you’ll want to stop paying for those licenses. If you have set up the account to forward email instead of converting it to a shared mailbox, remember that you maintain a license for the mailbox.
- Go to admin.office.com
- Click User Management
- Click the user you are offboarding
- Click Licenses and Applications
- Uncheck the boxes of the subscriptions you want to remove from the user.
- Click Save
Next, you will want to delete the license so you can’t stop paying for it.
- Go to admin.office.com
- Click Billing
- Click Products and Services
- Select Add/Remove license to delete the license so you can stop paying for it.
Removing the user license from Office 365 will release the Skype for Business PSTN calling number so it can be reassigned. If the user is part of a queue group, they will not be a valid target for queue agents, so you will want to make sure to remove them from any groups associated to the call queue.
Deleting the User Account
DO NOT delete the account if you have converted the mailbox to a shared mailbox or if you are using it for forwarding. The account is needed to keep the mailbox working.
- Go to admin.office.com
- Click User Management
- Click the user you are offboarding
- Click the symbol for Delete User
Note, this process marks the account inactive for approximately 30 days. After that time the account is truly deleted. Until then, you can restore the account if you find that you still need it for any reason.
Restoring a Deleted User in Office 365
Within the “approximately 30 day window”, you can restore a user’s account on Office 365 pretty easily.
- Make sure you have an available license for the user
- Go to admin.office.com
- Click Users
- Select Deleted Users
- Select the users you wish to restore
- Click the restore button
- Set password
- Follow the prompts to send a notification email if needed
If you encounter errors, such as a name conflict or proxy address conflict, follow Microsoft’s guidance here.
About Agile IT Tech Talks
Tech Talks are a service for Agile IT’s MSP and CSP clients. Each week we feature a subject matter expert who highlights a feature, platform, or function in a “Demo Heavy, PowerPoint Light” format. The presentation and demo is followed by a closed Q&A period where clients can engage directly with the expert to have their specific business needs addressed in a private, confidential open forum. If you are interested in the added value Agile IT provides with CSP licensing or managed services, tell us a bit about your environment, and a Cloud Service Advisor will contact you to discuss your available options.
