How to project in Windows 10 to your TV or wireless display
At Agile IT, we strive to be innovation leaders - we love playing with (and sharing) new technology. We're rather excited about Windows 10, and everything it can do. John Petroschek, a technical specialist and our resident Windows 10 guru here at Agile IT...

At Agile IT, we strive to be innovation leaders - we love playing with (and sharing) new technology. We’re rather excited about Windows 10, and everything it can do. John Petroschek, a technical specialist and our resident Windows 10 guru here at Agile IT, recently wrote us up instructions for how to project Windows 10 to a wireless display. We’re not into keeping cool information like that for ourselves, though, so we thought we’d add it to our “tips & tricks” blog from our technical team. Enjoy!
Step 1: Make the wireless display ready
Ensure that the device is able to receive a wireless source. It may need to be in a “screen mirroring” mode.
Step 2: Project the computer
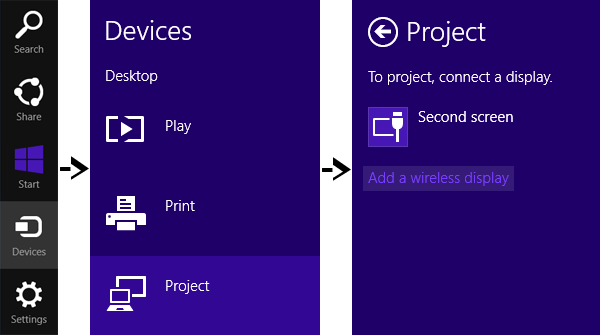
- Go to the “Charms Bar” (move mouse to the top right of the display or press Windows + C)
- Click on “Devices”
- Click on “Project” (Or press Windows + P) to get the Project option
 If your computer supports the Miracast display, then you will see an option to “Add a wireless display”.
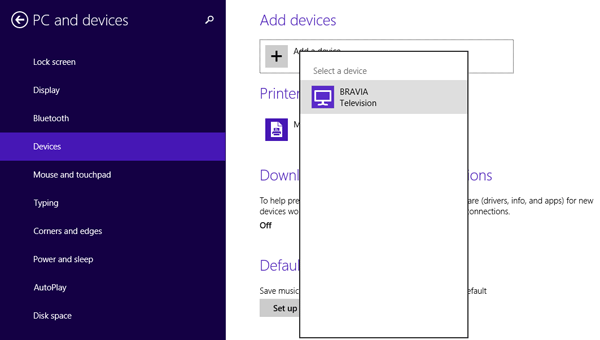
  Click on the option, and it will start searching for the new displays which are available in the given range. Once you see the desired device on the search results, click on the device name. Windows will now install the required drivers on the device and within a few seconds you will see the third part display displaying your device. Once you are done with the task and you want to disconnect the device, you can do so by either disabling the “Mirror” feature on your projector or TV or you can do the same from your computer by going to the “Project” screen (Windows + P) and clicking on the “Disconnect” option.


