Back

How to Create a Custom Office 365 Retention Policy

An Office 365 retention policy helps you manage the email lifecycle and minimize potential legal risks by establishing a maximum timeframe emails are kept. Microsoft routinely updates the default policies for messaging records management. For instance, deleted emails in Off...

2 min read
Published on May 2, 2017
How to Create a Custom Office 365 Retention Policy

An Office 365 retention policy helps you manage the email lifecycle and minimize potential legal risks by establishing a maximum timeframe emails are kept. Microsoft routinely updates the default policies for messaging records management (MRM). For instance, deleted emails in Office 365 were once only recoverable up to 30 days. Microsoft updated its retention policy so all emails are now recoverable, regardless whether users delete them.

However, to better manage emails and stay industry-compliant, you should configure your own custom retention policy in Office 365.

Setting Up an Office 365 Retention Policy

Before getting started, it’s important to note that a mailbox can only have one retention policy assigned to it, and users can still delete emails, even with an Office 365 retention policy in place.

To apply a retention policy to a mailbox, you’ll need to use retention tags. These settings outline the period a message should remain in a mailbox and what happens once that timeframe has passed.

Here’s how to create a custom Office 365 retention policy and assign retention tags:

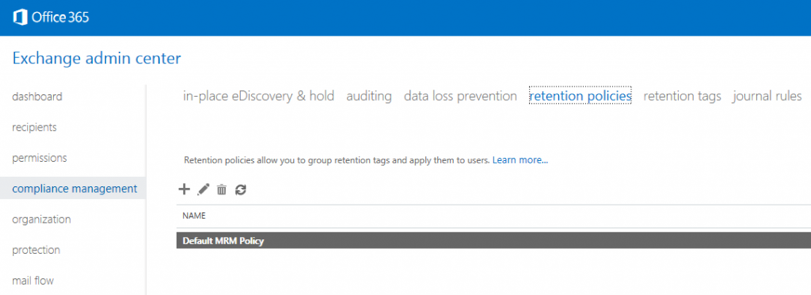
  1. Browse to Office 365 Admin > Exchange admin center > compliance management > retention policies. create Office 365 retention policy

  2. Select Default MRM Policy, click the edit icon and then change the name of the policy.

Note: Microsoft periodically updates the default policy titled “Default MRM Policy.” By changing the name of the policy, you will be exempt from Microsoft-initiated changes to mail retention.

  1. Next browse to Office 365 Admin > Exchange admin center > compliance management > retention tags.

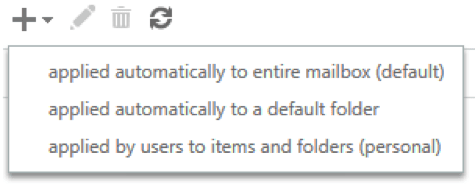
  2. Create retention tags by clicking the button and selecting the desired scope. Customer Retetention Policy          

  3. After creating desired retention policies, browse back to Office 365 Admin > Exchange admin center > compliance management > retention policies and click the icon.

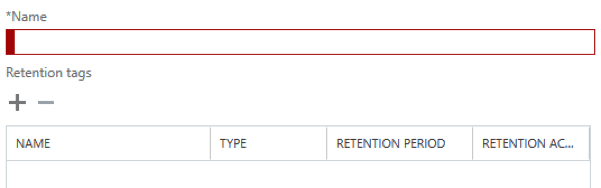
  4. Specify a name for the new retention policy, choose your newly created tags and click save. naming retention policy Exchange

Have more questions about creating Office 365 retention policies? Let us know your questions in the comments below. For more help managing your Office 365 environment, check out our Office 365 consulting services here, or request a quote:

This post has matured and its content may no longer be relevant beyond historical reference. To see the most current information on a given topic, click on the associated category or tag.

Related Posts

Implement Azure Backup Encryption for Data Security

Implementing Encryption for Azure Backup Data

Learn how to implement encryption in Azure Backup to protect your cloud data. Discover key methods, tools, and best practices to ensure data confidentiality and compliance.

Nov 19, 2025
6 min read
Best Practices for Migrating Email to GCC High

Best Practices for Migrating Email to GCC High

Discover the best practices for migrating email to GCC High. Ensure security, compliance, and business continuity throughout your transition.

Nov 18, 2025
9 min read
Ensure Microsoft 365 Backup Data Integrity

Ensuring Data Integrity During Backups in Microsoft 365

Discover strategies to maintain data integrity during Microsoft 365 backups. Prevent corruption, ensure reliability, and meet compliance standards.

Nov 7, 2025
5 min read
Microsoft 365 Tenant Migration for ITAR Organizations

Microsoft 365 Tenant Migration for ITAR-Regulated Organizations

Ensure compliance with ITAR during Microsoft 365 tenant migrations. Learn how to protect export-controlled data and choose the right cloud environment.

Nov 7, 2025
7 min read
NIST SP 800-171 vs 800-172: Key Differences Explained

Key Differences Between NIST SP 800-171 and NIST SP 800-172

Explore the key differences between NIST SP 800-171 and NIST SP 800-172, including how 800-172 enhances security for protecting Controlled Unclassified Information (CUI) against advanced threats.

Nov 4, 2025
6 min read
Tenant Migrations for DFARS-Covered Entities

Handling Sensitive Data in Tenant Migrations for DFARS-Covered Entities

Learn how to securely manage sensitive data during tenant migrations for DFARS-covered entities. Understand CUI protections, cloud tools, and compliance strategies.

Oct 31, 2025
7 min read

Ready to Secure and Defend Your Data
So Your Business Can Thrive?

Fill out the form to see how we can protect your data and help your business grow.

Loading...
Secure. Defend. Thrive.

Let's start a conversation

Discover more about Agile IT's range of services by reaching out.

Don’t want to wait for us to get back to you?

Schedule a Free Consultation

Location

Agile IT Headquarters
4660 La Jolla Village Drive #100
San Diego, CA 92122